Hello friends! Let’s see how to easy work with our shop vendor machine. Watch video, please
TUTORIALS
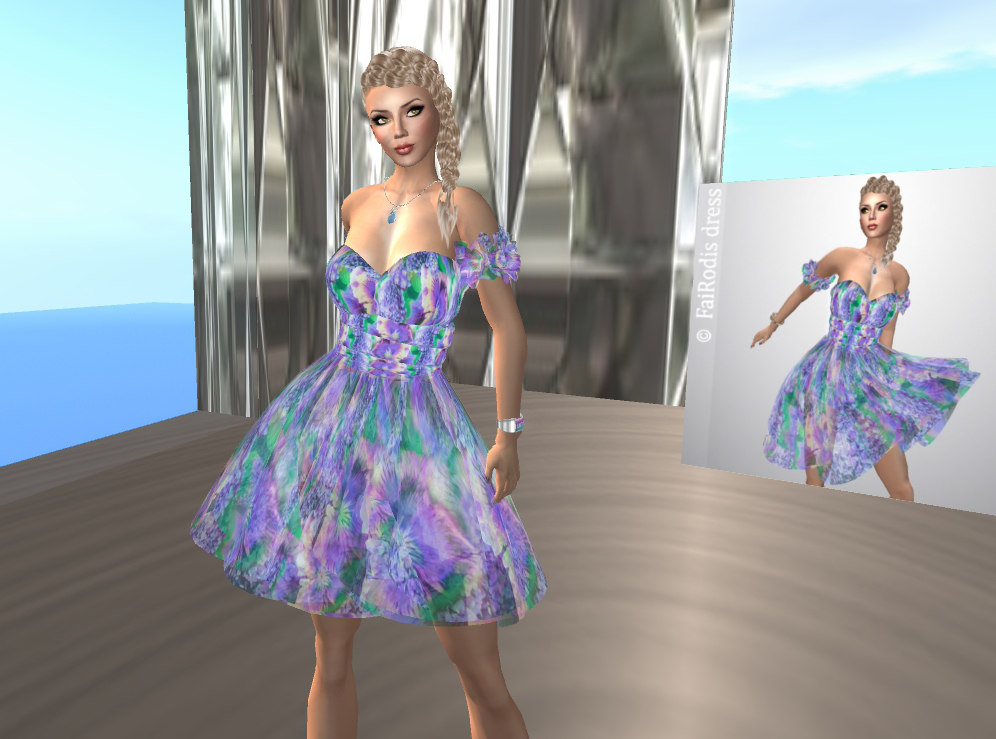
How set up dresses that suitable for wearing with both types of avatas
Hello friends! Let’s us show you how to easy set up dresses that suitable for wearing with both types of avatas (classical and mesh-avatars)
Additional benefits of wearing suc type of dresses is that you will be able to change size and easy adjust it according to your body shape, so you will not need to overload your inventory with many versions of dress for differnet types of avatars.
Also you will be happy to know that dresses we going to tell you about will not overload your avatar at high crowded sims, so you will have less lags and people will see your avatar good. For this moment most mesh-avatars can be seen as separated parts untill avatar became fully loaded, that do not looks good.
We will tell you how to adjust dresses even for very big hips and busts (chests). Talking about other types of body shapes just follow same steps. We used demo versions to create this tutorial, so you will be able to see result with your own eyes.
Step1
Before unpacking dresses please be sure that you at the sim where scripts are allowed for you. Then rez and unpack your dress.
Step 2
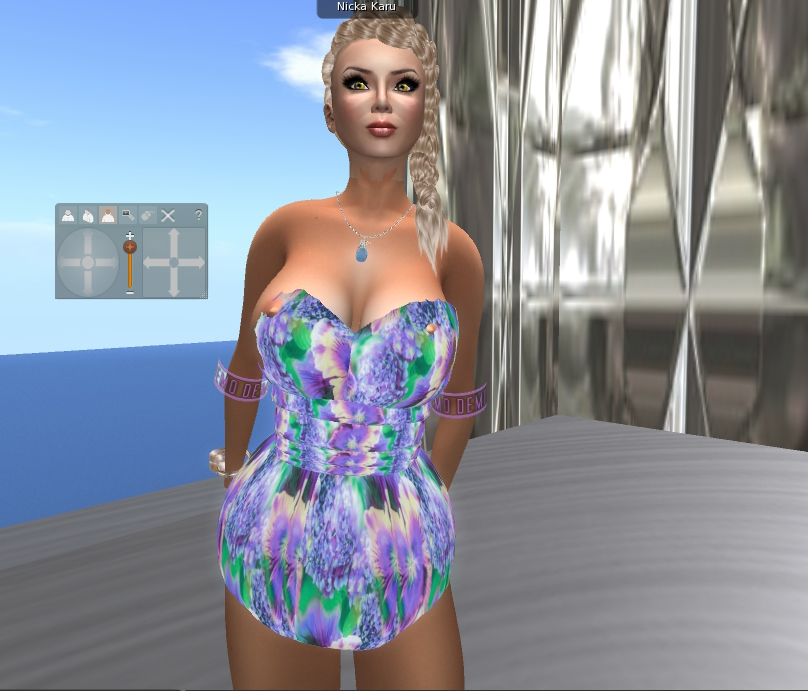
Wear dress without flexy skirt.

We recommend to begin adjustments from bust, then continue adjust waist and hips will be the last step.
Step 3
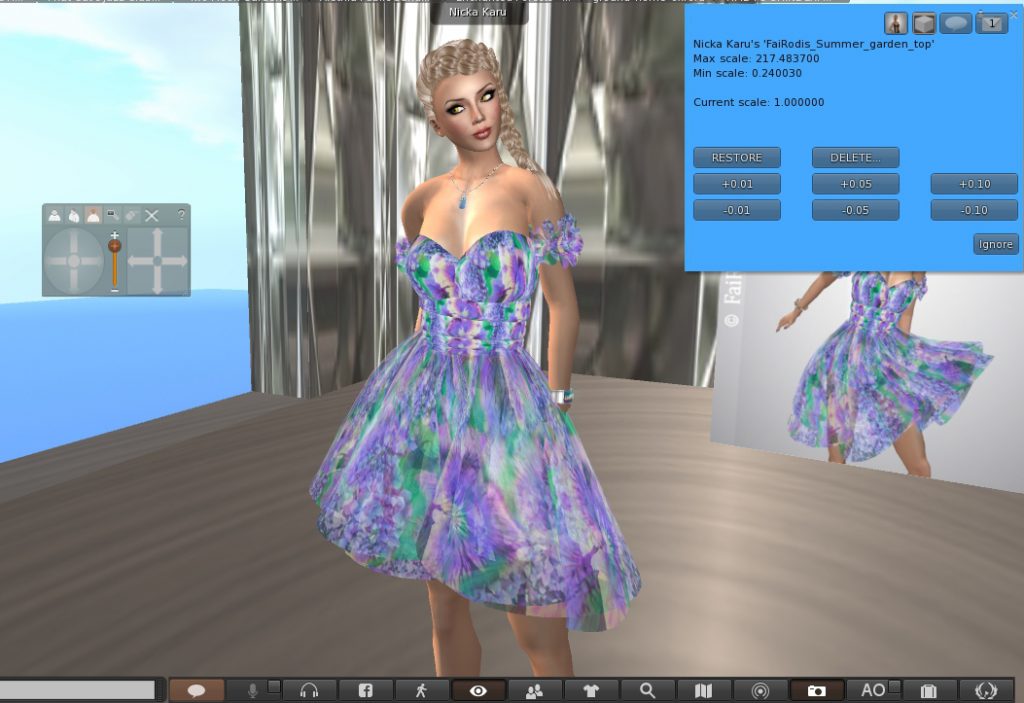
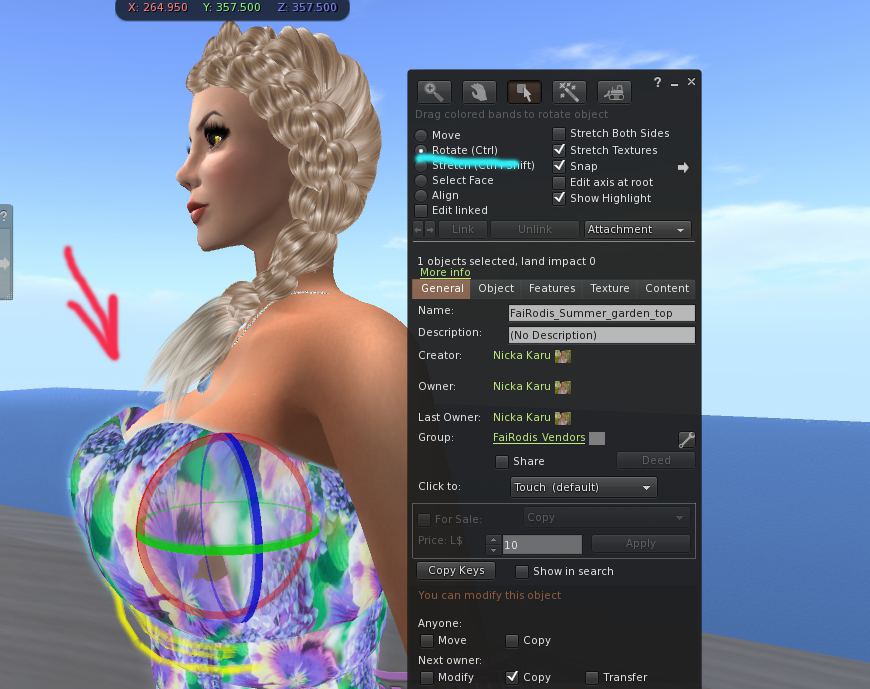
a) Click on your bodice. You will get dialog window at the up right corner of the screen. Click on [increase] or [decrease] button depending on what you need to adjust.
b) Switch on camera control to be able see your avatar from all directions. Then choose top view to see your avatar from the top.
c) Now you will be able to see what you need to adjust. You can adjust size using scripted menu described above or adjust position of parts of your dress by right click on it and then choosing [Edit] from menu. Then use arrows for accurate adjustment.

Attention!
At some cases you will need to adjust not just position of your dress parts, but rotation too, because in Second Life like in real life human bodies are not 100% symmetrical. So use rotation to adjust dress parts according to your body.

Step 4
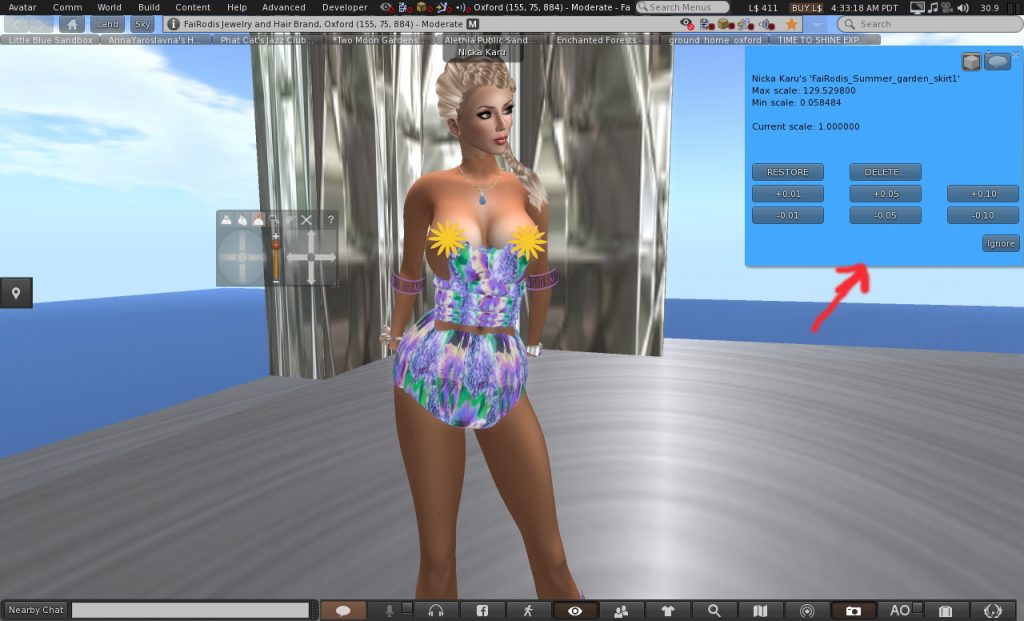
It’s time to adjust waist. Click on it. You will see pop up window again. Use increase/decrease buttons to adjust correct size. Better to use step of 5%. This will allow to adjust most beautiful body shape called “hourglass”
Step 5
Let’s adjust dress part for your hips now! Main thing is to adjust most convex part, I mean ass. As so as script changes size proportionally in all dimensions after you will complete adjustment check your down part of dress from left and right side. You will need to adjust it position from time to time. As result you can get popular “brazil butt”
Step 6
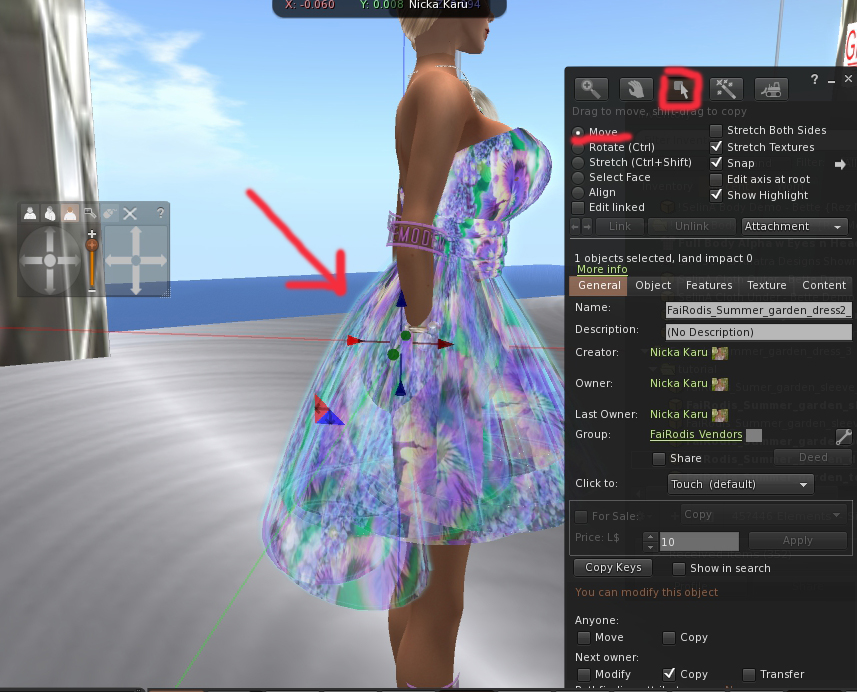
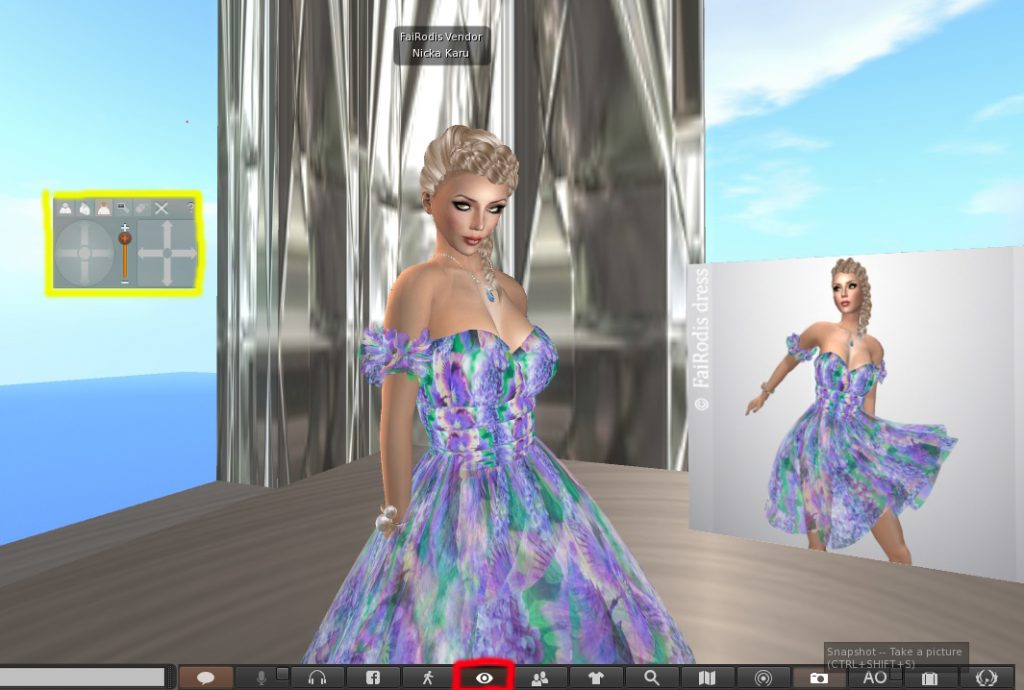
Use camera control to check your dress adjustment from all sides. Then wear flexy skirt, add +5%. Check from all sides and adjust position, move closer to back until it will cover dress under flexy skirt.
Congratulations! You adjusted your dress according to your body to underline your beautiful and fashionable shape.
Wear with pleasure!
FaiRodis SMARTPHONE in COVER instruction
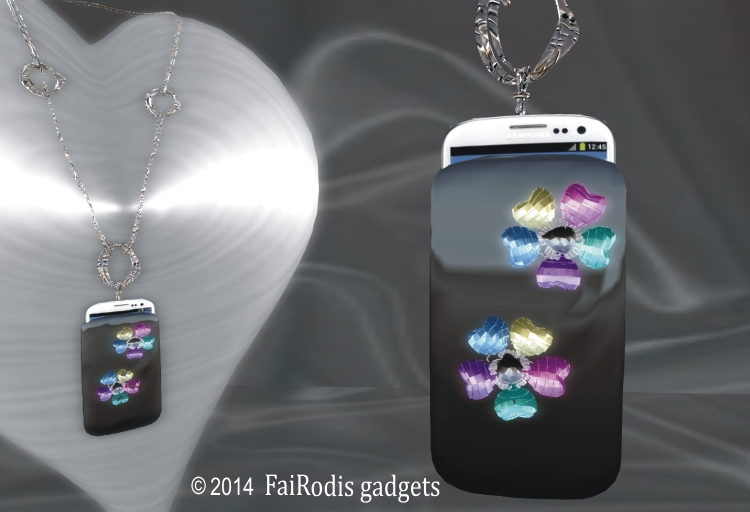
Hello friend! We tried our best to make this device very simple in use so instructions will be very easy 😉
Features:
* EASY ACCESS to our official web-site
* QUICK AND EASY TELEPORT from any location in Second Life to our in-world store
* Ability to BE ALLWAYS ONLINE with our manager
* SOUND SIGNAL and chat message about fresh news on our web-site at weekend
How to do:
* You can CHECK MOST FRESH NEWS yourself by clicking on SMARTPHONE IN COVER and choosing FRESH NEWS button. Then menu will offer you to visit our web-site. Choose GO TO PAGE button.
* you can EASY TELEPORT to our IN-WORLD STORE to see all our items with your own eyes. Just make one click on your SMARTPHONE in COVER and then choose IN-WORLS ST button. After this menu will offer you to visit Linden Lab official web-site where you will get button for teleport directly to our store. Choose GO TO PAGE button.
* You can EASY SEND MESSAGE to our manager from any point of your Second Life location (where scripts work for you). Just click on SMARTPHONE in COVER and choose MANAGER button. After this during 180 seconds you can type your message in general chat. After 180 seconds passed your message will be sent to our manager automaticaly 🙂 We will try to answer as quick as possible.
* This smartphone will periodically check our official web-site for news and when it will find some new publications it will make short signal.
Best viewer settings for awesome jewelry look
Hello friends!
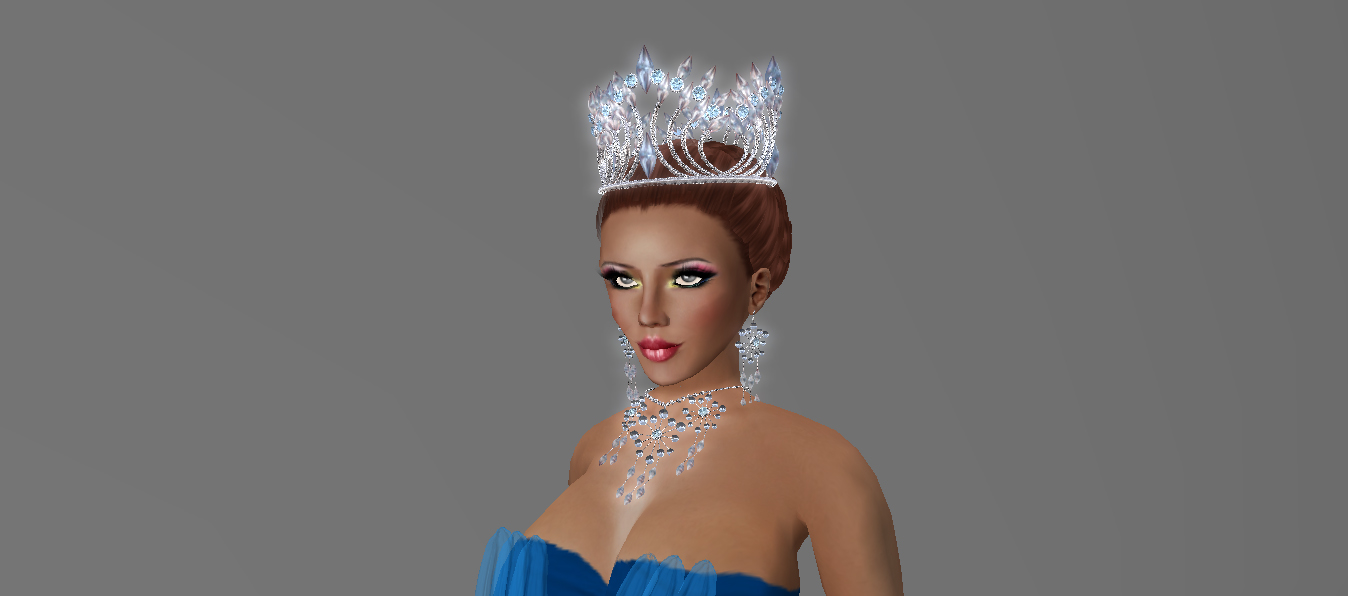
When I have had conversations with my friends and with customers in Second Life I realized that people are able, but do not know how to set their viewer to see their jewelry in the best way. That happens because during the first installation of the viewer system configure it to as high of graphic settings as possible, but unfortunately such autosetting in most cases is not good to to view your jewelry as pleasingly as possible, but it takes just 5 steps to correct the situation. In this article, I will share the SECRET with you!
At the beginning of this article I put a picture that shows how jewelry looks when the graphic settings are adjusted correctly. Next, I will show you examples of incorrect adjustments, and finish by showing you how to make the correct ones. All examples were made using the Firestorm 4.4.2 viewer, but you can easy find same settings in other viewers, too.
So In picture #2 you can see the same jewelry with LOW graphic settings:
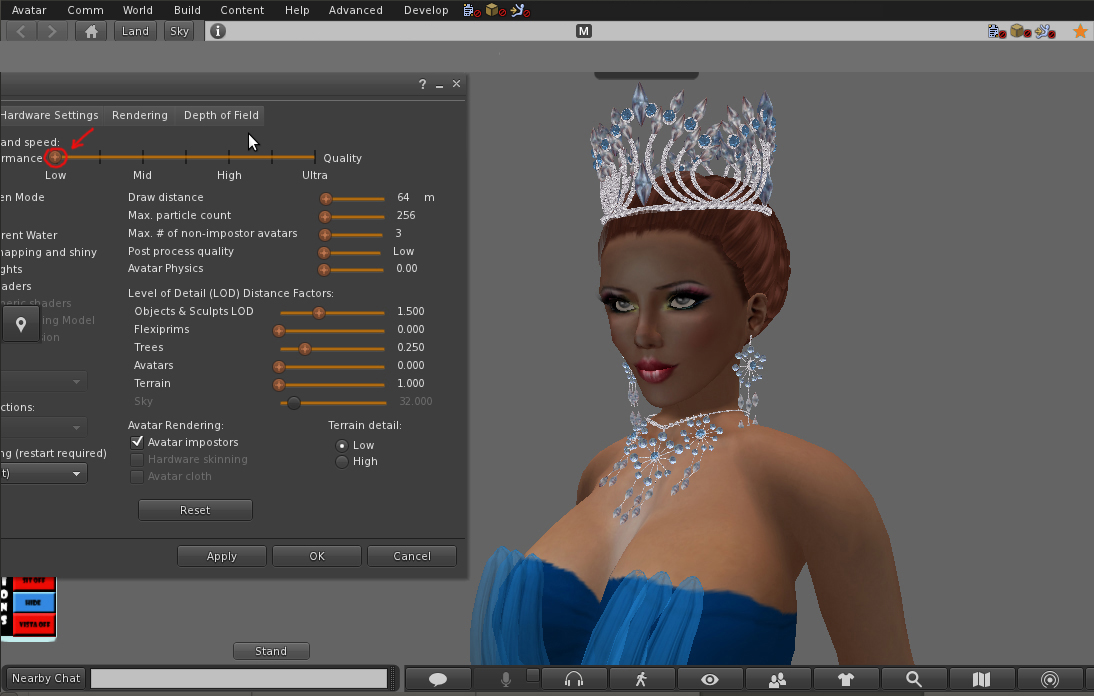
As you can see jewelry looks dark and flat with LOW graphic settings.
In picture #3, you can see the results of using the MEDIUM setting for viewer graphics:
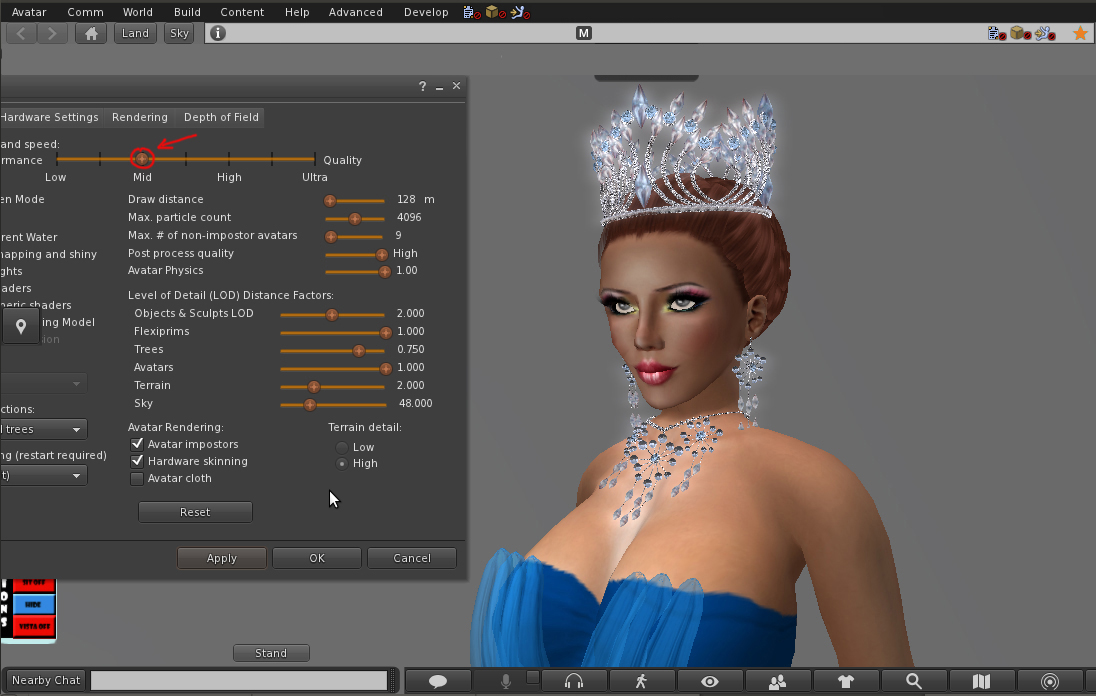
This looks better than a low setting, but some jewelry still hasn’t the beautiful shine it should have.
In picture #4, you can see the results of the HIGH graphic settings:
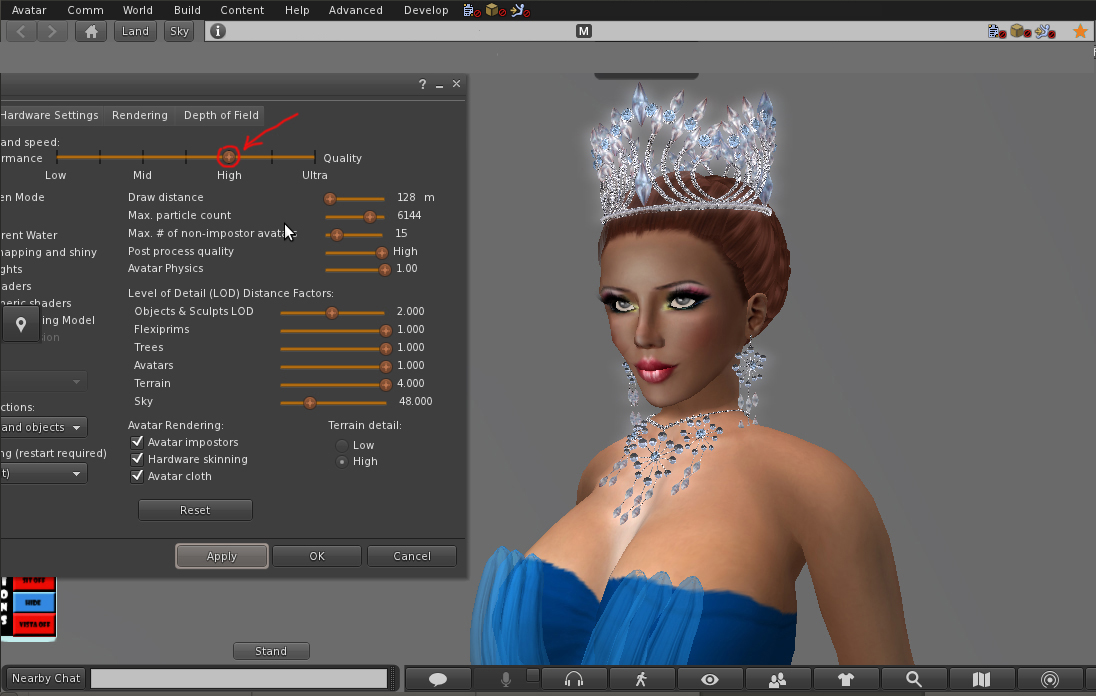 You can see that this settings do not make significant difference in comparison with MIDDLE graphic settings.
And now, in picture #5, see the results of ULTRA HIGH settings:
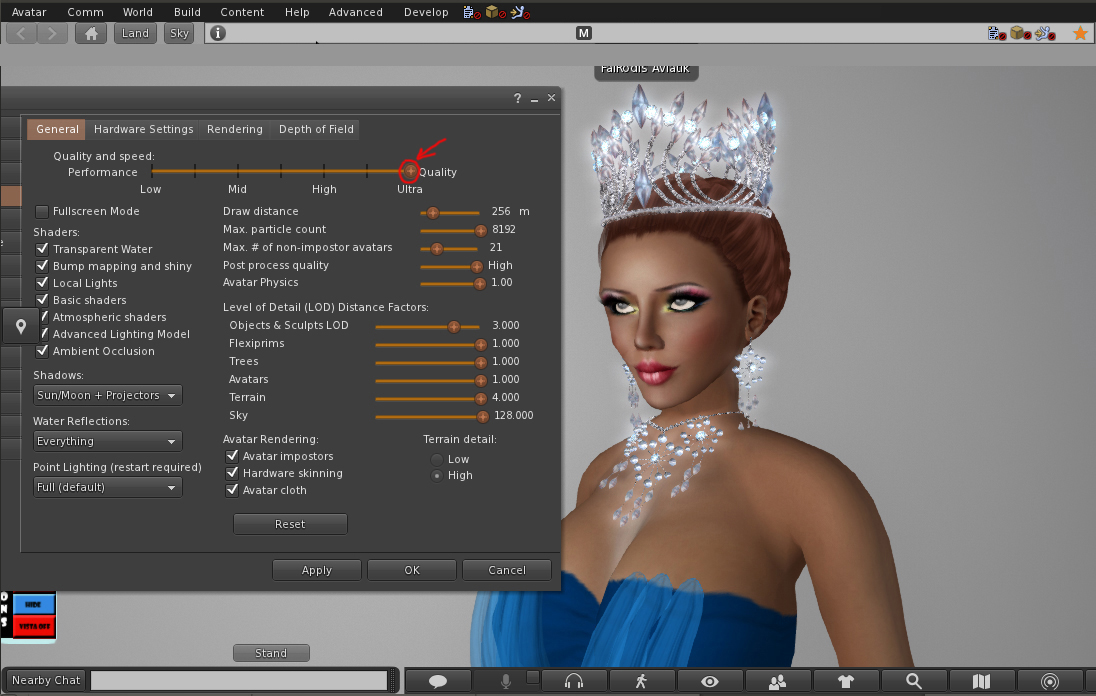
See — the jewelry looks flat again, but this time it’s because of too much shine. This is a good example that too much of a good thing is not always good!… 😉
And now let’s see how to adjust the view settings correctly:
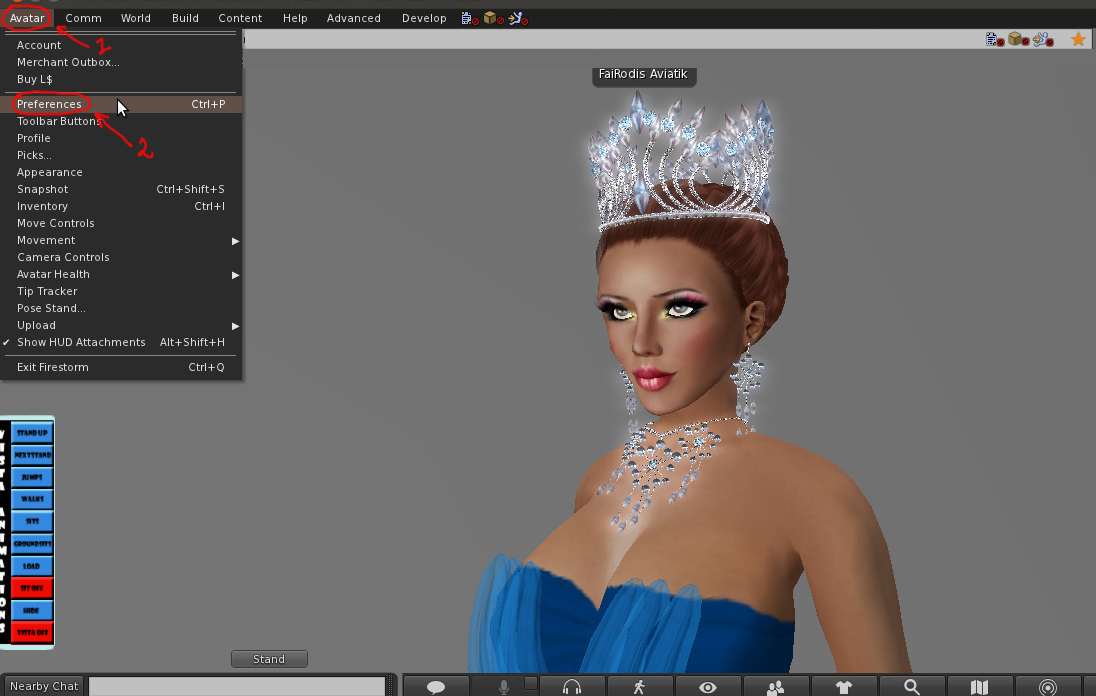
Step #1: Go to your viewer menu and find AVATAR settings in the upper left corner. Left click on it.
Step #2: From the menu, choose PREFERENCES and again, left click. You will get a special window with keys to all viewer settings.

Step #3: From the left column of the new window, choose GRAPHICS. This will give you access to fine tune your viewer’s graphic settngs
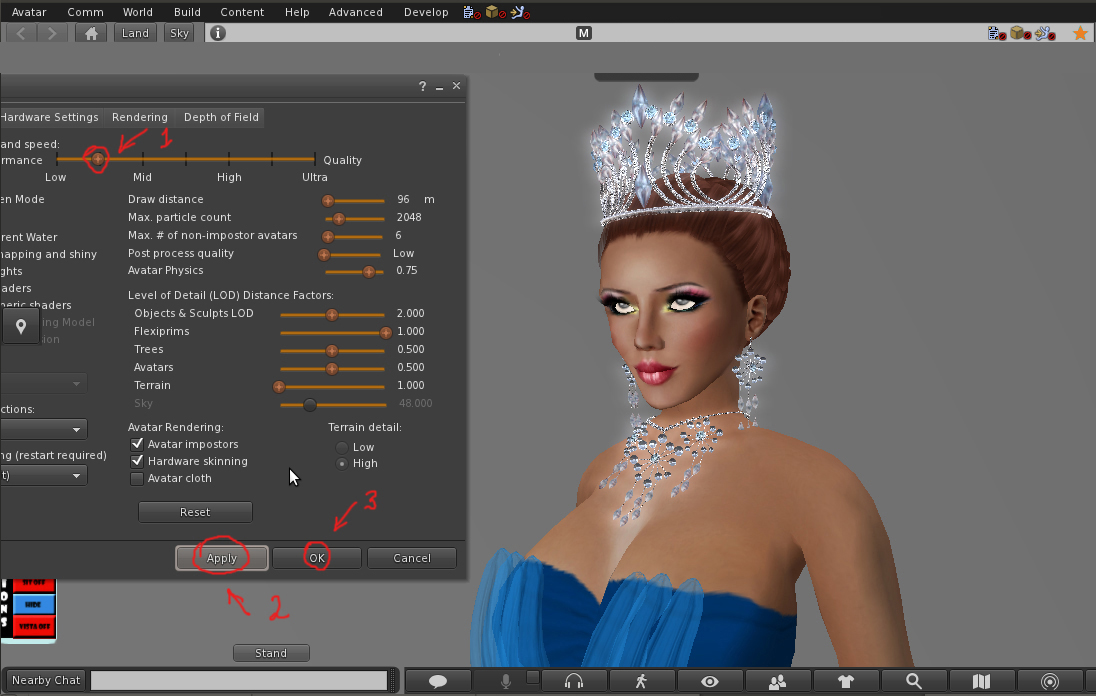
Step #4.1 Move the graphic settings slider to the position between LOW and MID graphical settings as shown in this picture.
Step #4.2 Click APPLY.
Step #5: Click OK. Congratulations! You did it! You set up the best settings for viewing jewelry in your viewer!
P.S. Also, in addition to making the jewelry look more beautiful, the performance of most computers will improve, depending upon the specific hardware.
As the creator of your jewelry, I will be happy because you will see my work in its full glory, as I conceived it while designing it for you.